| Reference Number: AA-00824 Last Updated: 2024-07-26 14:30 |
For more information, please visit the Online Grade Book Guide.
Accessing Manage Sections
1. Log in to your Hawkes Teach Account and open your course from the Instructor Dashboard.
2. Go to Tools > Manage Sections.
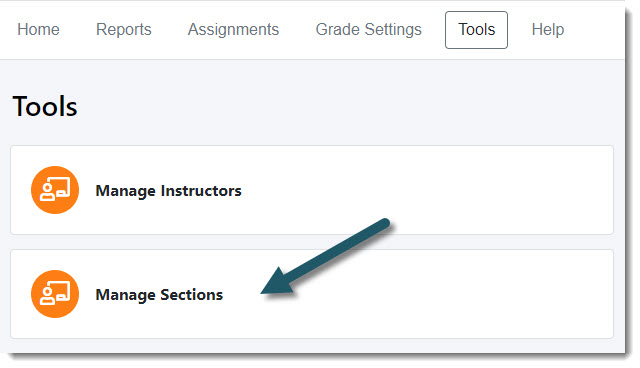
Adding a Section
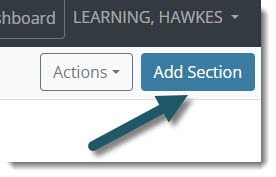
1. In the top-right, click Add Section.
2. Enter your section name, start date, end date, meeting times (optional), and your desired visibility.
- Shown: Available to instructors and students.
- Hidden: Not shown to students, but accessible to instructors.
- Inactive: Not shown to either. (Section will still be visible in Manage Sections)
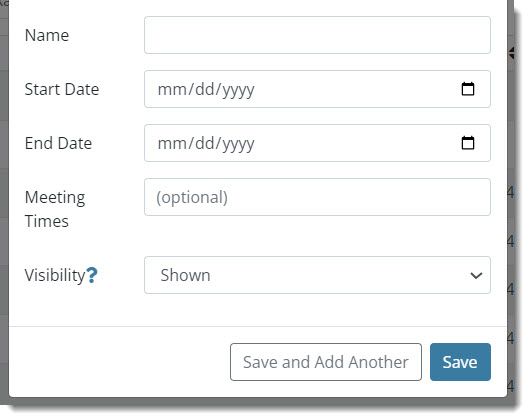
3. Click Save to return to the section list or Save and Add Another to add additional sections.
Editing an Existing Section
1. In your section list, hover the mouse over text you want to update. The row will change color to blue and the cells that can be edited will be a lighter blue.
2. Click on the cell you want to edit (section name, start date, end date, or meeting times).

3. Edit the field and click out of it to automatically save your changes.
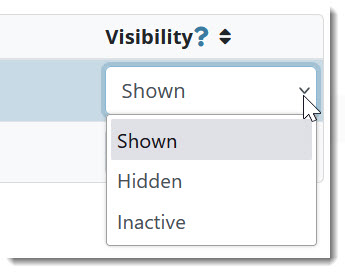
4. To change section visibility, click on the drop-down under the Visibility column and select the new option.
- Shown: Available to instructors and students.
- Hidden: Not shown to students, but accessible to instructors.
- Inactive: Not shown to either. (Section will still be visible in Manage Sections)
Using Advanced Settings
1. Click the box next to the section you want to edit.
2. Using the Actions button, select Advanced Settings.

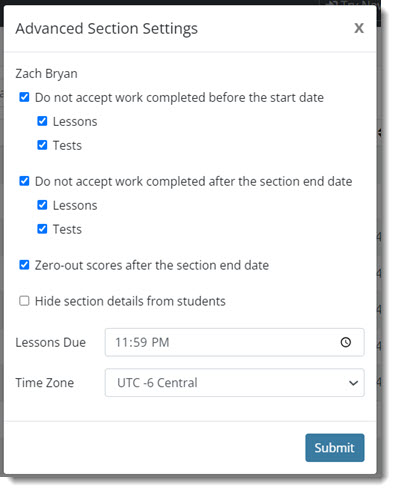
3. Update any Advanced Settings as needed. Click Submit once done.
- Note: These settings will default to Hawkes best practices. We recommend instructors do not update these settings unless their own custom setup deems it necessary.
Using Configure Sections
Users can configure sections to match the settings, assignments, and policies from sections that have already been set up.
1. Click the box next to the section(s) you want to configure.
2. Using the Actions button, select Configure Sections.

3. Click the Apply From dropdown menu to select the master section you would like to get settings, assignments, and policies from.
4. Confirm the sections in the Apply To dropdown are accurate.
- All sections selected in step 1 will show as checked in the dropdown.
- Additional sections can be added by checking the box next to the section name in the dropdown.
- Sections can be removed by unchecking the box next to the section name in the dropdown.
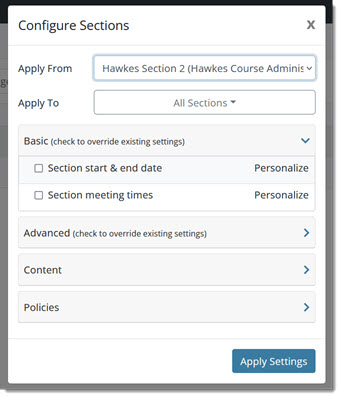
5. Users can pick and choose what Basic and Advanced settings to apply from the master section.
- The target section(s) will, by default, get all assignments and policies applied to it.
6. When finished, click Apply Settings.
Remove LMS Links
If you have any sections in your course that are linked to an external LMS course, an LMS Links column will display in your list of sections and LMS links can be removed if needed.
1. Click the box next to the section(s) you want to remove links for.
2. Using the Actions button, select Remove LMS Links.
3. A confirmation modal will appear listing the name of the section(s) that will be removed from the LMS course.
4. Click Continue to remove links.
Deleting a Section (This setting is currently disabled)
1. Click the box next to the section or sections you want to delete.
2. Using the Actions button, select Delete.

3. A confirmation modal will appear listing the name of the section(s) that will be deleted. Click Continue.
- Note: A CSV export of the student grades associated with the deleted section(s) will automatically download to your web browser for record keeping.
Manage Sections Training Video
Frequently Asked Questions
1. Will all the sections created before the new page is introduced still be there when the new page is released??
- Yes! No information will be lost when the new page is released.
2. Will Course Administrators still be able to see the sections of their instructors??
- Yes! The new Manage Sections page makes it easy for admin to find and view the sections they are looking for.?
3. Why don’t I always see the same columns in the table?
- The table is “smart” and only shows the user information that applies to their sections. All users will see Name, Start Date, End Date, Meeting Times, and Visibility.
- If a user is associated with sections that have owners other than themselves, then the “Owner” column will display.
- If a user is associated with sections that have LMS Links, then the LMS Links column will display.
- If a user is associated with sections that have multiple facilitators on a section, then the “Facilitators” column will display.
4. Do I need to set my section’s Advanced Settings every time I create a section?
- No! These are settings pre-set by Hawkes that reflect the best practices we recommend for instructor’s sections.
5. What does “LMS Link” mean? What does it mean to “Remove an LMS Link”?
- An LMS Link is a connection between your external LMS and your Hawkes section. These Links may need to be broken as a new semester starts if you want students to be able to enroll in to the new LMS course. Once the Link is removed, the association between Hawkes section and LMS course is removed.
6. Why isn’t there a save button?
- Saving now happens automatically when you add a section or edit section settings.
7. What happens if I accidentally delete everything in a cell on the table?
- If you delete all of the text out of one of the cells on the table without entering any new text, then move away from the cell by clicking or tabbing somewhere else, the previously entered text will show back up.